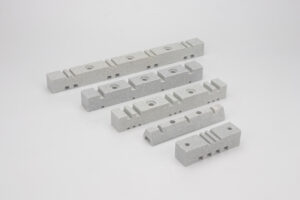
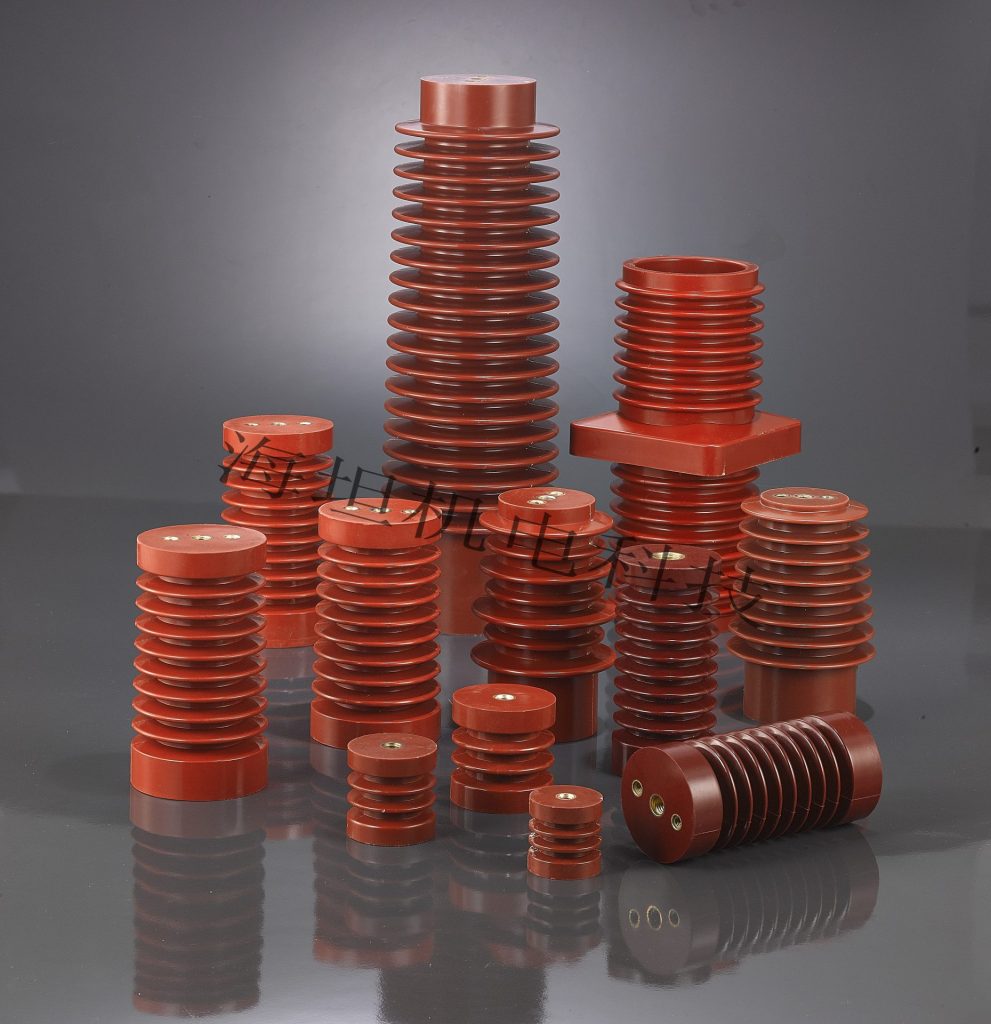
The Ultimate Guide to EL Busbar Insulators in Low Voltage Switchgear
When it comes to low voltage switchgear, you probably think about busbars, circuit breakers, and maybe even enclosures. But there’s one crucial component that often gets overlooked—EL busbar insulators. These little powerhouses might not grab the spotlight, but they’re essential for keeping your low voltage switchgear system safe, stable, and efficient.
In this guide, I’m diving into everything you need to know about EL busbar insulators in low voltage switchgear. Whether you’re an engineer, technician, or someone just curious about the inner workings of electrical systems, we’ll cover everything you need to know, from the basics to the nitty-gritty details. So, let’s get started!
What Are EL Busbar Insulators?
In low voltage switchgear, where current levels are high but voltages are typically under 1,000 volts, these EL Busbar Insulators act as the backbone of your power distribution system. They are specialised components used to isolate and support busbars within electrical switchgear systems. They’re designed to keep the busbars securely in place while preventing unwanted electrical contact between different parts of the system.So they prevent accidental contact with live conductors, reducing the risk of electric shock, burns, and electrocution
Think of them as the foundation of a well-organised electrical setup. Without them, busbars could sag, touch each other, or even short-circuit. That’s a recipe for disaster in any power distribution setup.

Why Are EL Busbar Insulators Crucial in Low Voltage Switchgear?
Using EL Busbar Insulators is not just a good idea; it’s a necessity.Imagine trying to balance a stack of books without shelves—chaos, right? That’s exactly what happens to busbars without the right insulators. Here’s why they matter so much:
1.Electrical Isolation
EL busbar insulators prevent electrical currents from leaking between busbars, reducing the risk of short circuits.
2.Mechanical Support
These insulators provide the physical strength to hold heavy busbars in place, even during high current surges.
3.Safety Assurance
By preventing accidental contact between conductive parts, they protect both the system and anyone working nearby.
4.Thermal Stability
In low voltage systems with high current flow, busbars can heat up. Insulators help maintain structural integrity under these conditions.
5.Prolonged Equipment Lifespan
By minimising wear and tear, insulators ensure your switchgear components last longer.
How Do EL Busbar Insulators Work in Low Voltage Switchgear?
Here’s a simple explanation: EL busbar insulators act as non-conductive barriers. They provide electrical insulation between live busbars and other conductive parts within low voltage switchgear. EL busbar insulators are made from BMC / SMC, which has excellent electrical and thermal resistance. They sit between the busbars and the metal framework of the switchgear, preventing electrical faults while providing a stable platform for the busbars.
Types of EL Busbar Insulators
Not all busbar insulators are the same. Depending on your specific needs, you’ll find different types designed for various applications. Here are the most common ones used in low voltage switchgear:
1.Cylindrical Insulators
Best for: Compact switchgear designs.
Features: Lightweight, easy to install, and capable of handling moderate mechanical loads.
2.Post Insulators
Best for: Larger switchgear setups.
Features: Can handle higher mechanical stress and larger busbars.
3.Strain Insulators
Best for: Applications with high tensile forces.
Features: Designed to manage tension and prevent movement of the busbars.
4.Flexible Insulators
Best for: Situations where vibration or thermal expansion is a concern.
Features: Allow slight movement without compromising insulation.
How to Choose the Right EL Busbar Insulator for Low Voltage Switchgear
Choosing the right EL Busbar Insulator for low voltage switchgear involves considering several key factors to ensure safety, efficiency, and compliance with industry standards. Here’s a concise guide to help you make the right choice:
1.Voltage Rating:The insulator must be able to handle the system’s maximum voltage. Always go slightly above your operating voltage for added safety.
2.Mechanical Strength:Evaluate the weight of your busbars and the mechanical stress they’ll experience. Choose insulators that can support the load without deformation.
3.Thermal Performance:Ensure the insulator can withstand the heat generated by high current flows. This is especially important in low voltage systems with heavy loads.
4.Environmental Conditions:Consider the impact of temperature fluctuations, humidity, UV exposure, and pollution on the insulator.If your switchgear is located in a humid or dusty environment, opt for insulators with protective coatings or materials that resist corrosion.And materials like composite insulators made from epoxy or silicone are resistant to UV and pollution, making them suitable for outdoor applications or industrial settings
5.Compliance with Standards:Look for insulators that meet industry standards like IEC or ANSI. This guarantees safety and reliability.
6.Space Constraints and Design: The physical space available and the design of your switchgear will influence the shape and size of the insulator you can use. Standoff, support, and strain insulators come in various shapes to fit different applications
Installing EL Busbar Insulators in Low Voltage Switchgear: Step-by-Step
Ensure accuracy and safety by following these streamlined steps:
Step 1: Prepare
Gather the appropriate EL busbar insulators, tools and personal protective equipment (PPE) such as gloves, safety glasses and insulated footwear.
Check that all components meet the system specifications.
Step 2: Power down
Disconnect the switchgear from the power supply to eliminate electrical hazards.
Step 3: Inspection
Inspect busbars for damage or corrosion.
Ensure that insulators are free from defects and meet the required specifications.
Step 4: Clean components
Remove any dirt, dust or moisture from busbars and surrounding areas.
Step 5: Position insulators
Align insulators with mounting points and ensure correct placement.
Step 6: Fasten insulators
Use appropriate fasteners (bolts, screws or adhesives) to secure insulators.
Tighten all joints to manufacturer’s specifications.
Step 7: Check installation
Ensure that there are no gaps between insulators and conductive parts.
Perform a visual inspection to confirm secure and accurate positioning.
Step 8: Test the system
Reconnect power and test the functionality of the switchgear. Check for signs of electrical leakage or operational problems.
Step 9: Document the process
Record installation details, including insulator types, positions and any observations.
Step 10: Maintain regularly
Schedule routine inspections to ensure that the insulators continue to perform reliably.
Common Issues with EL Busbar Insulators and How to Solve Them
Even the best insulators can encounter problems. Here’s a rundown of common issues and how to address them:
1.Cracks or Deformation
Cause: Excessive mechanical stress or prolonged heat exposure.
Solution: Replace the damaged insulator and ensure proper load distribution.
2.Contamination
Cause: Dust, grease, or moisture accumulation.
Solution: Clean the insulator with a dry cloth or specialised cleaning solution.
3.Electrical Tracking
Cause: High voltage stress causing conductive paths on the surface.
Solution: Use insulators with anti-tracking coatings or upgrade to higher-quality materials.
Real-Life Example: How EL Busbar Insulators Saved the Day
A friend of mine works at a manufacturing plant where they were having frequent power disruptions. The issue? Low-quality insulators were cracking under the strain of high current loads. After switching to epoxy resin insulators designed for low voltage systems, the plant saw a significant reduction in downtime and maintenance costs. The takeaway? Never underestimate the importance of good insulators.
FAQs
Q1: What materials are best for EL busbar insulators in low voltage switchgear?
Epoxy resin and thermoplastics are popular choices due to their excellent insulating and thermal properties.
Q2: How often should busbar insulators be inspected?
It’s best to inspect them during regular switchgear maintenance, typically every 6-12 months.
Q3: Can I reuse busbar insulators?
Yes, as long as they’re in good condition with no visible cracks or damage.
Q4: What’s the lifespan of a typical busbar insulator?
With proper care, most insulators can last 10-15 years, depending on the material and operating conditions.
Q5:What’s the Difference Between Low and High Voltage Switchgear?
The main difference between low and high-voltage switchgear lies in the voltage they can handle, but there are several other technical differences.
Best Practices for Maintaining EL Busbar Insulators
To keep your insulators in top shape:
Inspect Regularly: Look for signs of wear, cracks, or contamination.
Clean Periodically: Dust and debris can reduce insulation performance.
Avoid Overloading: Stick to the insulator’s rated mechanical and electrical capacity.
Conclusion
EL Busbar Insulators are essential for any low voltage switchgear system. From providing electrical isolation to supporting heavy busbars, these components ensure your system runs safely and efficiently.
Choosing the right insulator and maintaining it properly can save you from costly repairs and downtime. So, the next time you’re working on switchgear, give these unsung heroes the attention they deserve.
Have questions about EL busbar insulators? feel free to reach out—I’d love to help!
--- END ---
© Copyright 2024 China Haitan Electromechanical Technology Co., Ltd. All rights reserved.SUPPORT BY:JUNJ Privacy Policy

 E-mail:
  No. 20 Lingyun Road, Dongfeng
